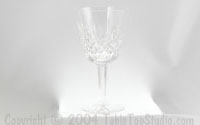
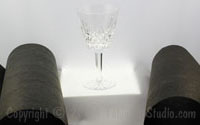
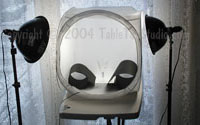
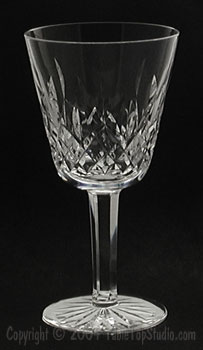
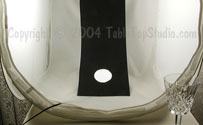
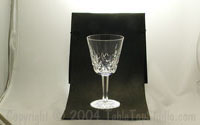
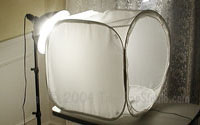
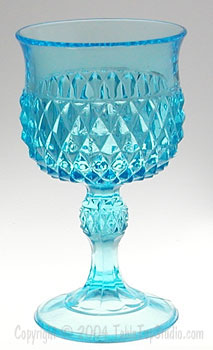
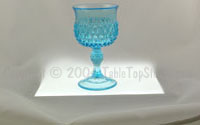
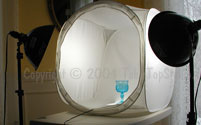
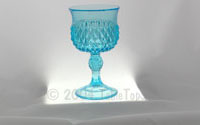
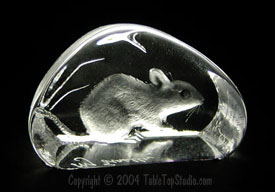
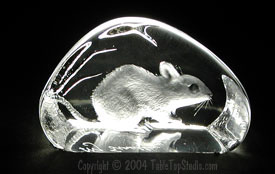
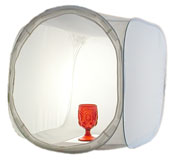
Taking good quality pictures of glass objects can seem intimidating.  However, there are some simple techniques which even amateur photographers can use to obtain dramatic results with minimal effort.   The following examples show three basic setups that should allow anyone to achieve results they can be proud of. The first two techniques illustrate dark field and light field photography (don’t be intimidated by the terminology the techniques are actually quite simple). The third technique is a variation of light field photography with a gradated background. The technique you choose depends on the style you prefer and the results you are trying to achieve.

These images were all obtained using an inexpensive two megapixel digital camera.  To simplify our setup we used an EZcube™ light tent to diffuse the light and provide the seamless background. We used a photoflood light set with daylight balanced bulbs as the main light source and a small daylight balanced illuminated flat panel for bottom lighting. (More details on the equipment can be found at the end of this page).


Objective:
A clean, shadow less image of a Waterford Glass,
on a light colored background.
 

  1. Place the illuminated flat panel inside of the EZcube, beneath the nylon sweep. Align the illuminated flat panel so that the longest side is running from the front of the EZcube to the back.
     

  2. Place the glass on top of the sweep, over the light panel, 1 inch from the front of the light panel, so that most of the light is behind the glass.  This will illuminate more of the glass, from the bottom on up.
     

  3. Add lighting from both sides (outside of the EZcube so it will be soft and diffused without harsh light reflections).
     

  4. Insert black paper as rolled tubes, on either side of the stem. (This adds nice black reflections back into the stem, to help define the shape). Adjust the paper until you can see the black appear where you like it.
     

  5. Photograph with a digital camera on a tripod to avoid blur. Set aperture f 8.0 for a maximum depth of filed, with a exposure compensation of E.V. +1.0 to lighten the background still more.

Glass edges disappear against
a light background

Black paper adds definition to
the edge of the glass

Two Lights position on the side


Objective:
A clean, shadow less image of a Waterford Glass,
on a dark background.
 

  1. Place the illuminated flat panel inside the EZcube, beneath the standard nylon sweep.
     

  2. Cut a hole in a piece of black, matte paper from an art supply store. The hole should be slightly smaller than the base of the stemware.
     

  3. Place the stemware on the paper, over the light panel, aligned with the hole so the light can shine through the hole and illuminate the glass. The paper should continue on up following the curve of the sweep, creating a seamless black background.
     

  4. Add one light source from behind the EZcube, be sure to shoot over the top of the paper just a little. This will help illuminate the upper rim.
     

  5. Photograph with a digital camera on a tripod to avoid motion blur. Ste the aperture at f 8.0 for a maximum depth of field,  with a exposure compensation of E.V. -0.7 to darken the background still more.

Black paper with hole

Align stem over cut hole

Single light position in back


Objective:
A clean, shadow less image of a colored glass goblet on a
graduated background with an illuminated effect.
 

The orientation of the illuminated flat panel will affect the background gradation. In the image on the left a shorter, dramatic transition from white to gray was created by running them light panel sideways.

In the image on the right we see a smoother, longer gradation of white to grey. More of the glass to the right is illuminated by this light panel position, rotated 90 degrees.

The orientation of the light panel will effect your image. Pull it forward, push it back, rotate it, play around with it until you see the effect you desire. Have some fun!

Illuminated panel in a
horizontal position

Two light set position

Illuminated panel rotated 90 degrees


Objective:
A clean, shadow less image of a crystal mouse on a
black seamless background with a glowing effect.
 

  1. Place the illuminated flat panel inside the EZcube, beneath the standard nylon sweep.
     

  2. Cut a hole in a piece of black, matte paper from an art supply store. The hole should be slightly smaller than the base of the crystal.
     

  3. Place the crystal on top of the paper, which is over the light panel. Align the crystal carefully with the hole that's been cut, so the light can shine through the hole and illuminate the glass. The paper should continue on up following the curve of the sweep, creating a seamless black background.
     

  4. Do not use any additional lighting in this case; just the illuminated flat panel. Due to the small size, and shape of this crystal, the illuminated panel can light up the entire mouse. This was evident during set-up.
     

  5. Photograph with a digital camera on a tripod to avoid motion blur. Set the aperture to f 8.0 with a exposure compensation of E.V. -0.7 to darken the background still more.


Glass Photography Tools

1. EZcube
For soft, diffused lighting, softer shadows, and reflection control.

2. 5000K Illuminated Flat Panel
 "daylight color"  flat  panel for true color, quality under lighting.

3. 5000K Compact Fluorescent Lights
 "daylight color"
for true color quality lighting.

4. Tripod
For image sharpness.

5. Digital Camera
Any inexpensive two mega pixel camera.

Copyright © 2004 Greenbatteries, LLC. All rights reserved.